
Blog
Welcome

Recent posts
SEARCH RESULTS FOR: Photojunction Store

This weeks 'Share of the Week' goes to Richard Perry Photography based in England , who shared his latest Queensberry's on Twitter . Thanks for sharing, Richard. There’s a wee thank you on its way to you. "My latest @queensberrynz album has arrived... I love the classic elegance. Beautiful way to store your memories! #weddingalbum #weddinghour" Be sure to tag us when you share your Queensberry products on Instagram, Facebook or your blog. It doesn’t just make us feel good, it’s a nice way to promote your products and services too. See more from Richard Perry To View More >>

We sincerely apologise to those of you that have been affected by the current errors occuring when designing Flushmount albums in Photojunction. For those of you that wish to have a full bleed image on the page after a translucent title you will be encountering an error that stops you from proceeding. We are aware of the problem and are working on a solution in Photojunction. In the meantime we have two options for getting around this issue: • Either drop the image onto the layout and physically drag the image to the edges or; • Instead of selecting the title option, leave a note in the special To View More >>
You know something's been done right when its simplicity takes you by surprise ... either that or something's wrong! If I told you something that previously needed its own piece of software can now be done with the click of a button, would you believe me? It's true. Over the past couple of months the guys at Photojunction have been developing a feature especially for Queensberry clients. They've integrated the FTP process into Photojunction and released it in the latest release of Photojunction, beta 1.26b. Ordering and sending your album is now one smooth, easy process. You won't need LabFTP any To View More >>
Everyone has a different workflow, there's no question about it. Most wedding photographers have a shooting season and…the rest of the year. Depending on your clients, album design could be year round, but if you're lucky, you finish your album season shortly after your shooting season. The "downtime" is used for maintaining your business, small shoots, networking, and maybe taking it easier. One of the most important things to take care of during this time is organizing and backing up files. I 'm afraid album files get forgotten sometimes. I can't stress enough, you should back up your files. To View More >>
All software evolves as new features are added and new versions released. Photojunction and Photoshop are no exception, and, as PJ takes advantage of more, often newer, features of Photoshop, its "backwards compatibility" with older versions is lessened. That's why we recommend that you use Photoshop CS3 or later with Photojunction. If you use CS2 or even earlier, chances are that it will work fine, but you may occasionally find that some PSD files don't import correctly as images or templates, or that you get error messages when exporting with PS scripting. If that happens, all Support can do To View More >>
Here's my second handy hint about file management. Don't muck about with your hi res files outside Photojunction after they've been imported. The key words there are outside Photojunction. If you want to keep the software smiling, they're important. It means you need to think about when and how you copy image files, and when you are going to do your artwork. Here are three alternative scenarios, which all keep PJ happy if used properly: 1. Do art work on your images before importing them. This is so you can import one set of finished files without lots of extra images, sub-folders etc to confuse To View More >>
Wading through our "how-to" posts was quite a job. Trying to single out the best was just as difficult, but worth the effort. Here are my favourites. Hopefully you'll find them handy when dealing with Queensberry and Photojunction, and evaluating your own workflow... There's so much good stuff in the Smooth Sailing series I reckon you should check them all, but here are a few: Photo Front covers (easy peasy) - If designing Photo Front covers sounds hard. It's not. Here's how to easily do it. What can delay your orders? - Here are a few simple things that frequently delay people's orders (long To View More >>
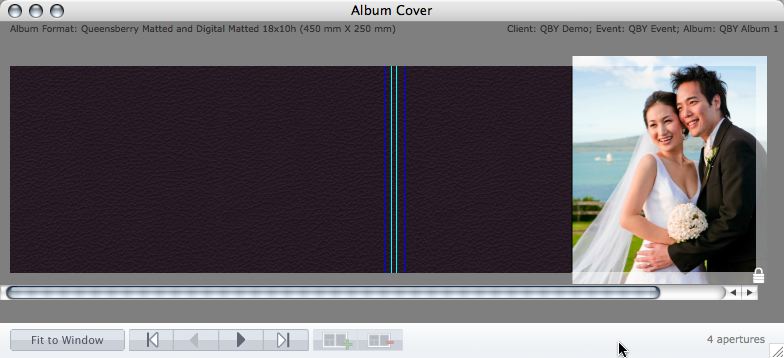
Cover layout design in PJ Remix Here are the first steps in preparing a perfect, hassle-free print-and-bind order, really fast. 1. First, upgrade to PJ Remix. If you have already, thank you. 2. Use Remix to design your cover as well as your page layouts. You'll get to frame and crop the cover image yourself, see exactly what it looks like and be sure that it looks good. For example, here you can see how much of the image in the photo front cover layout above has been cropped away. No problem in this case, but many images won't be suitable: 3. Export your cover AND page layouts using Remix's Export To View More >>
Photojunction has changed so much during the year that we're going to build a brand new series of five minute (give or take) classroom demo movies, and we'd like you to be involved. The plan is to record the movies live during a webinar. We'll intro and close each separate five minute movie so we can easily chop the recording up afterwards, but you'll still be able to ask questions. We'll fit as many 'mini movies' into the hour as we can. For the first one, here's what we'll be gunning to get through: Start here! (Photojunction overview) Download and set up Photojunction Start New Project (begin To View More >>

Shortly after the iPad was announced, Nigel posted about wanting to run Photojunction on it. While that hasn't happened (yet), the iPad has become quite a popular tool for photographers. Personally, I like to use it to present final album designs to clients. Photojunction makes creating and editing layouts so simple, that sitting there with a client flicking through their spreads takes the mystery out of knowing exactly what they'll end up with. There are so many presentation options within Photojunction, but here's a few that work with the iPad... 1. Slideshows Want an album slideshow to fit perfectly To View More >>
Email: info@queensberry.com
Free Phone Numbers:
New Zealand: 0800 905 905
Australia: 1800 146 251
USA: +18668350851
UK: 0800 808 5271
Canada: +1 855 581 0370